Both knife and axe throwing are exciting pastimes that are gaining in popularity. Quality knife throwing targets and axe throwing targets are available online, and this article reviews some of the best options. These can accommodate smaller throwing objects (such as traditional throwing knives and shurikens) as well as larger throwing axes and tomahawks.
If you have time, interest, and a few woodworking skills you can even build one yourself. We’ll also show you how. We discuss designs for building both a simple knife throwing target as well as a professional grade axe throwing target. Let’s get started.
Introduction to Knife and Axe Throwing Targets
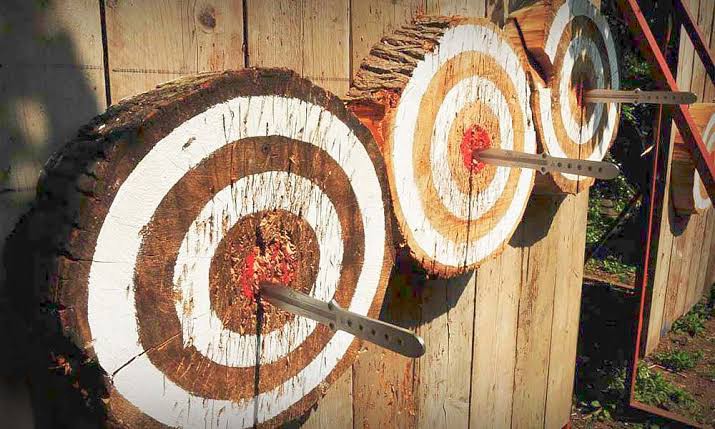
Knife throwing targets range from simple hanging targets, to portable foldable targets to natural log rounds. All are excellent options.
Simple hanging targets are great for yards with trees. Folding targets are easy to set up and store, and are designed to be highly transportable. And log rounds are are a great natural alternative, designed to be set up all year round. We’ve tried all three with success.
In general, we prefer targets that have a large surface area. While we like traditional log rounds, it may be difficult to locate a 24″ diameter log. In these cases, we simply reduce our throwing distance accordingly.
The key for all knife and axe throwing targets, however, is sturdiness and reliability. And those reviewed below tick all those boxes.
And while these targets can withstand the elements, we recommend storing them inside when not in use to extend their lifetime. We treat ours like any other piece of outdoor furniture.
So with that out of the way, let’s review some of the best options for both knife and axe throwing targets.
4 Great Knife and Axe Throwing Targets
At a glance:
- BIGSHOT Wooden Axe Throwing Target
- 2-Ring Foldable Axe and Knife Throwing Target
- LJ’s Log Targets 16″ Throwing Target
- Simple Hanging Axe and Knife Throwing Target
BIGSHOT Wooden Axe Throwing Target (w/ Bottle Opener)
No products found.
Features
- Heavy duty solid wood target
- Plywood backed 2×10 boards
- Hanging chain hardware installed
- Bottle opener
- Dimensions: 35.5″ x 27.5″
- Weight: approximately 40 lb.
Overall Impression
We like this target for its simplicity and durability, and its perfect for throwing knives, axes, and tomahawks. The surface area is wide enough for all throwing objects, and the overall product is well-built and stable.
If used for knife throwing, this target likely won’t last longer than 6-12 months with consistent use. If used for heavier objects (such as tomahawks), don’t expect this to last longer than 3-6 months.
We found that wetting the target prior to use improves results. Not only will it improve stickability, but it will also help extend the life of the product.
The target is meant to rest against a wall or other surface at the desired angle. Hanging hardware is also included, which allows you to secure it to a tree or other object.
Overall, a great starter target that is well-built, study and with a wide surface area. Suitable for all types of throwing objects from knives to axes and tomahawks.
Pros:
- Solid, well-built product
- Screwed, not glued, which allows for replacement of sections as needed over time
- Comes with a bottle opener – cute, but a nice touch
- Generous dimensions
- Excellent reviews
Cons:
- No support or stand included
- May splinter after repeated axe or tomahawk throwing
- A fairly simple product with no bells and whistles
2-Ring Foldable Axe and Knife Throwing Target
No products found.
Features
- Sound dampening board to minimize impact noise
- Kickstand foldable legs
- Dimensions: 30″ x 43″
- Weight: 61 lbs.
Overall Impression
This 2-Ring foldable target from Tomahawk Targets is an excellent product, and will sure to provide hours of outdoor fun. While this is the most expensive target we’ve reviewed, there are lots of features about this product we like.
First, the product is heavy which makes it sturdy for many throwing objects – including axes and tomahawks. The surface area is also quite large, which is perfect for inexperienced throwers.
Second, the product has a foldable kickstand which allows you to place the target anywhere without having to rely on a tree of wall to prop it up.
Third, the product comes with installed handles which makes it easy to transport. And we love this feature. It’s great to bring to a friend’s house for an afternoon barbeque or party.
Like other targets reviewed here, we recommend wetting the surface area prior to throwing. This will both improve the stickability of the target and extend the product’s lifetime. It is attractively painted, with bullseye, 3-point ring, 1-point ring, and two smaller targets (or “clutches”).
Overall, this target is expensive but it one of the best options we’ve reviewed.
Pros:
- Solid, well-built product
- Screwed, not glued, which allows for replacement of sections as needed over time
- Attractive and functional 2-ring design
- Handles and foldability makes transport easy
- Kickstand/support included
- Generous dimensions
- Excellent reviews
Cons:
- The most expensive target we’ve reviewed
- May splinter after several months of repeated axe or tomahawk throwing
LJ’s Log Targets 16″ Throwing Target
No products found.
Features
- Painted and sealed
- 3 removable legs
- Dimensions: 16″ diameter round, 54″ long supports
- Weight: 40 lbs.
Overall Impression
LJ’s Log Targets are a great, natural alternative to traditional targets. These are made of solid wood rounds approximately 16″ in diameter. Each target round is 4.5″ thick, painted and then sealed to protect from cracking.
Each target comes with 3 54″ long legs to keep it upright and stable. Once set up, we found these log round targets quite sturdy. This is a great looking, well-built target that sits at an excellent height.
The only drawback to this product is its limited surface area. For beginners, we recommend starting with a toe line close to the target to gain confidence sticking the target. Then gradually increase the throwing distance. Otherwise you run the risk of missing the target, and even losing your throwing knives. At its reasonable price point, you may even consider purchasing a few and lining them next to each other.
Purchasers love the natural surface and give the LJ Log Target near perfect reviews. Made by a great company that stands behind their products.
In addition to 16″ log rounds, 22″ log round are also available.
Pros:
- 100% natural wood surface – no metal parts to ding your knives
- Very sturdy, despite its long legs
- Great price point
- Proudly made in Pennsylvania, USA
- Excellent reviews
Cons:
- Log rounds are a natural product, so diameter may vary by +/- 1″
- 16″ diameter may be too small for inexperienced throwers
- That said, larger sizes are available by request
Simple Hanging Axe and Knife Throwing Target
No products found.
Features:
- Nicely painted
- Well constructed from solid spruce planks
- Hanging hardware included
- Dimensions: 24″ x 24″
- Weight: 30 lbs.
Overall Impression
The Simple Hanging Axe and Knife Throwing Target is a great solution for yards with trees. Measuring 24″ x 24″ with a 4″ thickness, this target has good surface area for all throwing objects. It is attractively painted, with bullseye, 3-point ring, 1-point ring, and two smaller targets (or “clutches”).
Perfect for both throwing knives and small axes. For areas without trees or walls, we recommend the 2-Ring Foldable Axe and Knife Throwing Target above.
Wetting the surface before throwing will help mitigate splitting and extend the product’s lifetime. We also recommend bring inside when possible to minimize exposure to the element.
Purchasers love the fact that it is a heavy, dense target. Like all of the targets reviewed above, this one also gets near perfect reviews.
Pairs perfectly with a weekend, a bottle of craft beer, and a good set of throwing knives.
Pros:
- Great solution for yards with trees
- Handing hardware allows you to modify the target height as needed
- No-frills, simple solution
- Reasonable price
- Proudly made in Austin, TX
- Excellent reviews
Cons:
- Because the targets hangs from a tree, it may twist if a heavier object (axe or tomahawk) hits the side of the target
- This issue goes away if the target is hung against a wall
- Some complain about the longevity of the hanging chain
How to Build a Knife Throwing Target
Making a knife or axe throwing target is easy to do, and likely cheaper than purchasing a new one. With some basic lumber, a few woodworking tools, and a little bit of elbow grease, you can create a high quality target in an afternoon.
Below we provide two approaches to building a throwing target. Both result in highly durable targets that not only look good, but are highly functional.
Building a Simple End-Grain Knife Throwing Target
Below is a great video by Boone Down South describing how to create a simple end-grain target for throwing knives and shurikens. While this design is meant for smaller throwing objects, it can accommodate smaller axes. Please be sure to like his video and subscribe to his channel.
For this project, you’ll need the following:
Materials:
- Two 96″ (8 foot) long 4×4 posts
- 4″ wide boards for the board rims
- Waterproof, exterior wood glue (ie, Titebond III)
- Optional hanging hardware, including two eye screws and chain
Tools:
- Table saw or simple hand saw
- Power drill
- Clamps
- Ear and eye protection
- Small scraper, paint brush, or foam brush (to smoothen the glue)
Step 1: Cut the post into small blocks
With a table saw or hand saw, start by cutting both 4×4 posts into 48 blocks that measure 3 7/8″ long. You want to measure 3 7/8″ long (not 4″ long) to accommodate the thickness of the blade.
Step 2: Arrange the blocks
Once all the blocks are cut, arrange them on the floor to see how the finished board might look. We’ll glue them together in a future step. You may want to lay out the blocks over several pieces of wax paper to avoid getting glue on the ground.
Note how the end grain will appear in the final board. Experiment by changing the placement of the individual blocks to achieve different end-grain patterns.
Step 3: Cut the rim boards
Once the layout of the blocks is completed, it’s time to build the perimeter. Any scrap wood will do, even leftover pressure-treated deck boards. Cut the boards to a 3 7/8″ width. Cut 2 rim boards the length of the target, and the remaining 2 rim boards slightly longer to accommodate the overhang due to the thickness of the boards.
Step 4: Apply the glue
Apply good quality waterproof glue designed for exterior use to each side of the block, such as Titebond III. Smoothen the glue with a scraper, foam brush or piece of scrap wood to ensure the block is well coated and glue is uniformly distributed. Do the same for the perimeter boards.
Apply clamps and allow 24-48 hours for the glue to fully cure.
Step 5: Install hanging hardware
Once the glue has cured and the wax paper has been removed, the target is ready to hang. Keep in mind that the target will be heavy, so select heavy duty hardware that will accommodate the weight.
Drill two pilot holes through the rim board to accommodate two large eye screws. Install the eye screws and hanging hardware such as a chain or cable. If desired, sand down any residual dried glue and securely hang the finished target on a wall.
Congratulations – your simple throwing knife target is done!
Looking for a set of throwing knives for your new target? Or perhaps instructional resources to improve your form and throwing consistency? Feel free to browse our articles below.
Read more >>> Best Throwing Knives for Beginners
Read more >>> Knife Throwing Books and Instructional Resources
How to Build an Axe Throwing Target
While the simple end-grain target design above will work for axe throwing, some may prefer a more professional target.
Below is a great video by Artfully Rouge describing how to create a heavy duty target for throwing knives, axes and tomahawks. As always, please be sure to like his video and subscribe to his channel.
Building a Professional Quality Knife and Axe Throwing Target
For this project, you’ll need the following:
Materials:
- Three 96″ (8 foot) long 2×10 boards
- Three 96″ (8 foot) long 2×4 boards
- Two 2×6 boards; a third board is optional, but recommended
- Scrap plywood
Tools:
- Table saw or simple hand saw
- Power drill
- Large diameter spade bit (optional)
- Large straight edge
- Builders square
- Wood screws
- Ear and eye protection
- Black, red, blue, and green paint and 1″ paintbrush
Step 1: Cut the target boards
Start the project by cutting each 8 foot long 2×10 boards in half. This will create 6 smaller boards. Lay out 5 of these boards across widthwise and 1 board on top of a piece of scrap plywood. Trace and cut plywood to size.
Remove boards and place plywood on the ground. Lay each board on top in the same layout as above and screw securely into place.
Step 2: Prepare the bullseye
Place the ruler or straight edge from the top outside corner of one of the 5 vertically placed boards to the bottom outside corner of the opposing vertically placed board, and draw a line in pencil. Do the same on the other side. The intersection will be the center of the bullseye. According to the National Axe Throwing Federation the height from the floor to the center of the bullseye is 63″.
For more information on how this is done, please refer to the below video.
Step 3: Paint the target
Now it’s time to draw and paint the target. Lay the final target board on the ground and draw the bullseye and outer rings using the following official diameters from the National Axe Throwing Federation:
- black bullseye: 7″ in diameter
- red 3-point red ring: 17″ in diameter
- blue 1-point line: 27″ in diameter
In addition to painting the above targets, paint two green dots (often referred to as “clutches”) at the top of the target. Measure 39″ from the base of the target board and 4 1/4″ from each seam of the center boards, and paint a green dot
Step 4: Attach the legs
Attach the 2×6 boards to each side using lag screws or other heavy duty screws. Attach each 2×6 board such that the end is flush with the top of the target. The other side will extend beyond the height of the target board.
In a later step, we will attach the legs of the target to the end of these boards.
Step 5: Build the stands
Cut one of the 2×4’s in half. Center each half on the bottom of each of the 2×6 boards, and screw into place using either lag screws or other heavy duty screws. Repeat this step for the other half. Be sure to use a framing square to ensure a 90 degree angle, as this will serve as the legs and support system of the target.
Step 6: Build the stand supports
With the remaining two 2×4 boards we will build supports for the stands. Cut the second 2×4 in half. With the builders square, mark in pencil a 45 degree angle at the end of each and cut. Butt the angled cut up against one end of stands, and cut another 45 degree angle at the the top. Repeat this step with the final 2×4 board and anchor in place.
If this is confusing, feel free to refer to the video at about the 2:30 minute mark.
Step 7: Add axe rack
This step is optional, but serves two purposes. One, it creates a convenient place to hold your axes while not in use. And second, it serves as additional lateral support for the entire throwing target.
With a large diameter spade bit, drill 2-3 holes along the third 2×6 board wide enough to accommodate the diameter of your axe handles. This will serve as a “storage rack” for your axes when not in use, and is a great feature. Then cut the 2×6 board to fit between the two 2×6 leg boards and screw into place.
Step 8: Install rolling wheels (optional)
If desired, install rolling wheel casters at the bottom of each foot – two per foot. This allows you to conveniently move your axe throwing target when you need it and store it when not in use. Note that the final axe throwing target is heavy! However, it can be moved by one person if no wheels are installed.
Congratulations, you have now finished building a professional grade axe throwing target!
Looking for instructional resources to improve your axe-throwing form and consistency? Feel free to browse our list of instructional books.
Read more >>> Axe and Tomahawk Throwing Books and Instructional Resources
Can I Use Plywood for Knife Throwing?
Yes, we have had success using scrap plywood as a knife throwing target. However, we recommend this solution for indoor use only as plywood will not withstand constant exposure to the elements. Over time, the individual plywood sheets may pucker and peel away.
After repeated use, the outermost ply in the plywood can also splinter. For best results, we always recommend an target that has been intentionally designed for knife throwing, or natural log round.
Can I Use Plywood for Axe Throwing?
We don’t recommend using plywood as an axe-throwing target. Given the added weight of the axe and its forward momentum, it is likely to split the plywood after repeated use. And this can be dangerous.
For best results, we recommend a more durable solution specifically designed for axe throwing. These include the throwing targets reviewed above, as well as similar custom-built solutions such as the one shared by Artfully Rouge.
Best Knife and Axe Throwing Targets – Final Words
We hope you enjoyed this review on knife and axe throwing targets. We reviewed what we feel are the best knife and axe throwing target options available online. That said, the market is constantly evolving and new products are always added. So be sure to check back here in the future for new product reviews.
Until then, grab your throwing knife set, throwing axe or tomahawk, set up a throwing target, and have some fun!