Owning a Japanese knife is a great asset in the kitchen. But to get the most out of them, you need to sharpen them. The edge of knives naturally dull out after prolonged use, so sharpening them is your best guarantee to keep the knives as sharp as day one. But learning how to sharpen Japanese knives is not difficult.
Below is a quick guide on what you need to sharpen and care for almost any Japanese knife, as well as the step-by-step process in doing so.

What You’ll Need to Sharpen Your Knives
You’ll want to make sure you have all the tools necessary to sharpen your Japanese knives. Don’t try cheapening your way out of this step. Cheap sharpening tools can lead to ruined knives, or at worst, injuries.
These tools fall into two types: Sharpening Stones and Honing Steels.
Sharpening Stone
When discussing how to sharpen Japanese knives, let’s start by talking about whetstones and waterstones. Sometimes you’ll hear those terms used interchangeably, but that isn’t correct.
Technically, any type of sharpening stone is a whetstone. So while a waterstone is a whetstone, not all whetstones are waterstones.
Waterstones, commonly made in Japan, are first submerged in water. The amount of time a waterstone should be submerged varies, but ~5-10 minutes is usually enough (the coarser the stone, the longer it needs).
The water then acts as lubrication, so that any particles coming off your knife blade will leave the sharpening stone easily.
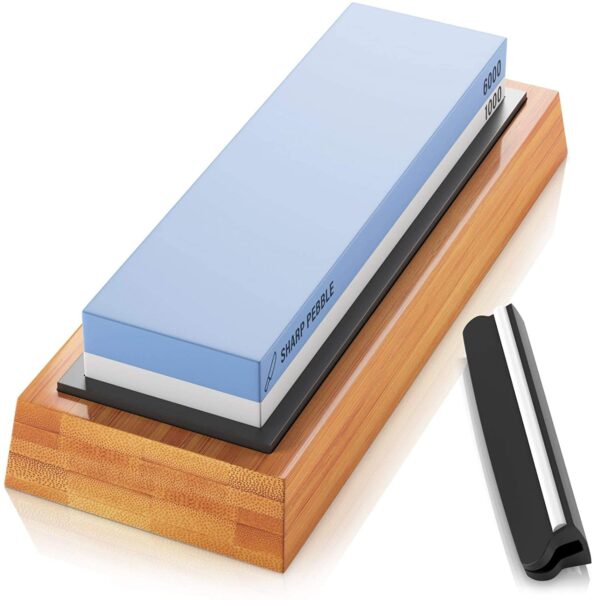
These blocks of stone come with different levels of grit, meaning how coarse or how smooth they are. These will depend on the type of knife you have, as well as where you are when it comes to the sharpening process.
Sharpening keeps the edge sharp by removing small amounts of metal to grind the edge to a finer point.
The two sides are used in conjunction with the “coarser” side when you start to sharpen the knife and the “finer” side when finishing up.
As you’re essentially removing metal from the knife, you’ll want to be able to practice sharpening your knife well. Don’t try to go too fast, or you’ll end up removing too much metal and damaging the side of the blade.
If you’re wondering which stone you’ll need, here’s some quick guidance:
- For regular sharpening, go for 1000-2000 grit
- To remove the finer scratches/burrs left by a coarse stone, use something above 2000. 3000-6000 is a good ballpark for beginners
- For very rough sharpening on a particularly dull blade, choose <400 grit
Honing Steel
A honing steel/rod is something you’ve probably seen in your kitchen or your parent’s kitchen but perhaps never learned how to use it.
Put simply, a honing steel bends your knife’s edge to a straighter position to ensure edge retention in your newly sharpened knife. This is different from a whetstone or waterstone, as the honing rod does not remove any metal at all and realigns the blade in a better position.
But to get to the point: is honing steel suitable for Japanese knives? The answer is, well, kind of.
Firstly, never use a honing steel on a single-bevel knife. Such as a deba, usuba, yanagiba, (etc.) as these would get damaged.
But otherwise, for double-bevel blades like a gyuto or a santoku knife, honing can be a quick stop-gap in between ‘proper’ sharpenings with a knife. It’s quick (no faffing around submerging a stone), and requires less skill.
A honing steel, then, can be important too — you don’t want to keep removing metal from your knife if all it needs is to be realigned to start cutting properly again. It’s no substitute for stone sharpening long-term, but it can definitely reduce the frequency at which it is required.
Step-by-Step Sharpening Process
Owning and investing in a good array of knives necessitates you to take the proper steps to maintain them as well. When if comes to how to sharpen Japanese knives, it just takes 5 tasks to ensure that your knife will stay as sharp as you need it to be.
Pre-Step: If You Have a Waterstone
This step is primarily for users who have Japanese waterstones.
You’ll need to submerge the stone in water until all the bubbles that form from the block disappear. This means that the porous surface of the stone has been properly lubricated with water.
Step 1: Secure Your Stone
Securely place your sharpening stone on a non-slip surface. You can use a rubber mat or even a damp towel to ensure that the stone stays in place while you’re working.
It seems like an obvious step to some, but you’ll be surprised how many people accidentally hurt themselves with loose stones while sharpening. Take the proper precautions always before you start sharpening.
Start with the coarser side first when attempting to sharpen any knife.
Step 2: Sharpen the First Side
Now that you’ve secured your stone, you can start trying to sharpen your knife’s first side.
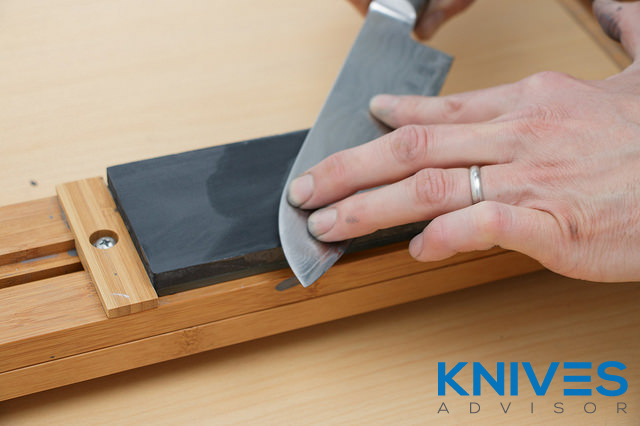
Start by placing your blade edge away from you and flat on the surface of the stone. You’ll want your knife to be lying across the stone, not parallel to it.
Lift the knife spine upwards towards you until the blade edge touches the stone at a specific angle. For most Japanese knives, you’ll want to keep your knife at around 14-16 degrees above the surface.
Tip: lots of sharpening stones you can find on Amazon such as this one come with an angle finder
If you don’t have an angle finder (which I’d really recommend!), when angling your blade, you can hold it at a 90-degree angle then move down half that, which gives you 45 degrees.
Go down half more from 45 degrees, and your knife should be at 22.5 degrees. Now go down slightly less than half that, and you should be at your desired angle for sharpening.
Place your fingers on the top side of the blade, making sure you keep enough distance away from the cutting edge. Start pulling the blade towards you in a smooth circular fashion while keeping the angle of sharpening constant. Pull the knife edge-to-edge of the stone depending on the dullness of the knife.
Doing this starts to create a burr or debris generated from the sharpening. This will be the key to determining if your knife was sharpened correctly.
Step 3: Check the Burr of the Sharpened Side
Remember how we mentioned that the burr would be the key in checking if your knife has been sharpened enough? Doing this properly needs to be done with caution as you may hurt yourself if you do it incorrectly.
Hold the knife by the spine, then position your knife perpendicularly against the blade edge.
Slowly feel for a bump of excess metal extending from the edge of the blade. These bumps you may feel are the “burrs” or metal fragments that are displaced when sharpening your knife.
Never run your thumb along the blade, as this will easily cut your skin even with a dull knife. If you don’t happen to feel any burr or metal fragments, you may have one of two situations.
The first situation is that you have improperly angled your knife, causing the burr to miss the edge. This means you may have shaven too far from the edge itself. Reposition your knife and sharpen again at the correct angle.
The second may be that you simply hadn’t removed enough metal. Move your knife more along the stone to remove more metal and sharpen the knife further.
Step 4: Sharpen the Opposite Side
Now that your first side has been sharpened thoroughly and has developed a burr, sharpen the other side of the blade by repeating Step 2 and Step 3.
Consistency is key here since you don’t want to have a blade with uneven sharpening on either side.
Keep your movements consistent and your angle precise. You can keep count of how many times you sharpen the blade across the stone to make sure your knife gets the same amount of sharpening on both ends.
Step 5: Repeat the Entire Process on the Finer Side
Don’t just leave yet once you finish both sides, as a true razor-sharp finish comes from knives being sharpened first on a coarse side and then sharpened on a finer side.
Ensure you follow step 1 as well when you’re switching sides, as a moving sharpening block can be dangerous for you and your knives.
Beyond Sharpening
Learning how to sharpen a knife is easy once you get enough practice at it. Most well-made Japanese knives don’t require much sharpening because they’re usually made out of tough carbon steel.
But the secret of most owners of Japanese knives is that their knife maintenance goes beyond just sharpening. Owning a Japanese knife is an investment in itself, and like any investment, you’ll start looking for ways to safeguard them.
Beyond sharpening, you’ll need to focus on cleaning and storage.
A good way to clean the Japanese knife is to always use gentle dish soap and warm water while never using anything abrasive on it. Rough surfaces may damage the knife and remove and treatments the blade has.
You’ll also want to start applying knife oil to the blade. Knife oil can be any mineral grade oil, but most Japanese knife companies sell specialty knife oil to keep your blade corrosion and rust-resistant.
Storing your knives are as key as any other knife maintenance routine out there. You basically need to ensure that when your knife is not in use, it is protected from the elements and other kitchen tools.
The last thing you want is your newly sharpened blade dulling itself on a spoon, so invest in a good knife sheath or even a quality knife block to store several knives at a time.
Conclusion
In this article, we discussed how to sharpen Japanese knives. Learning the sharpening process of any higher-end knife will always be tricky. The Japanese make this especially tricky as their knives need to be at a lower angle of sharpening compared to their western counterparts.
Nevertheless, it’s essential to know how to properly care for your blade to keep its cutting edge sharp as the day you first bought it. See if you have any good but dull knives lying around and start sharpening now.
